Thursday, March 26, 2009

Happy Birthday, Hannah!

It was my roommate's birthday last week so, of course, I baked her a cake. I asked her what kind she wanted and she said she didn't really care so long as it had pink frosting. My go to cake is my mother's Cocoa Fudge Cake. It calls for buttermilk and I had been waiting for an opportunity to use my own (I had made butter two days previously and had not yet used the buttermilk) and lo, the universe provided me with one. Or Hannah did. Or I did by deciding to make the Cocoa Fudge Cake.

Cocoa Fudge Cake

For two 8-inch layers

  • 2 cups flour
  • 1 1/2 cups sugar
  • 2/3 cup cocoa
  • 1 1/2 tsp.baking soda
  • 1 tsp. salt
  • 1 1/2 cups buttermilk
  • 1/2 cup butter
  • 2 eggs
  • 1 tsp. vanilla
  • My mother's instructions read as follows: 350° oven. Measure all ingredients. Blend 1/2 minute; beat 3 minutes. Bake oblong 35-40 min.; bake layers 30-35
  • Or you can do it by hand, which mom actually always does. Cream butter and sugar. Beat in eggs. Add vanilla and buttermilk. Sift in flour and cocoa. Beat. Add soda and salt. Beat until smooth. Pour batter into greased and floured cake tins and bake in a 350° oven 30-35 minutes or until cake tester comes out clean.
Mom usually puts raspberry jam between the layers and frosts the cake with her Cocoa Butter Frosting, which is perfectly scrumptious and as it should be, but try making Cocoa Butter Frosting pink. Instead I decided to use the Cocoa Butter Frosting between the layers and a plain buttercream frosting with a little cream cheese on top. To make it pink I made a strawberry syrup, because I just couldn't bring myself to put poison (i.e. red food coloring) in my roommate's cake.

Cocoa Butter Frosting

Use to frost Cocoa Fudge Cake

  • 1/2 cup butter, softened
  • 1/3 cup cocoa
  • 2 cups icing sugar
  • 1 1/2 tsp.vanilla
  • 2 Tbs. milk
  • Beat until smooth.

Cream Cheese Buttercream Frosting

Enough to frost and decorate an 8-inch cake

  • 8 oz. butter
  • 4 oz. cream cheese
  • 1 lb. icing sugar
  • Beat until smooth.
It is likely that you will have to trim your cakes to make them level. I went a bit crazy and trimmed the tops, edges, and bottoms off my layers so all that was left was the soft interior of the cake. You don't have to go that far, but the beauty of trimming your cake is that you'll have a bit to try before serving it. I took a piece of the top of one of the cakes, spread cocoa butter frosting on it, put another piece of cake on top of that, then some of the cream cheese buttercream on top of that and called it a treat for the cook. It would be no less than unconscionable to serve a cake one has not tasted onself.

Tuesday, March 17, 2009

French Country Loaf

This post assumes you have a viable starter. There are two steps to making this loaf. First you make your production leaven and once that has risen you make your final loaf.

Refreshing the leaven

Adapted from Andrew Whitley's Bread Matters

  • 160g wheat leaven starter
  • 50g stoneground wholemeal wheat flour
  • 150g strong white flour
  • 120g water
  • Mix all ingredients together and leave in your warm place for 4 hours. The production leaven is ready when it has risen appreciably and not collapsed.

French Country Loaf

Adapted from Andrew Whitley's Bread Matters

  • 100g stoneground wholemeal wheat flour
  • 300g strong white flour
  • 7g sea salt
  • 300g water
  • 300g production leaven
  • Mix all ingredients together except the production leaven. The dough formed will be quite soft. Turn dough out onto clean (not floured) work surface and knead for 10 minutes to develop the gluten. The dough is going to stick both to your hands and to the work surface. Resist the urge to add flour. After a few minutes your dough will firm up a bit. Add the production leaven and knead for a few more minutes, adjusting the softness by adding either water or flour. Your dough should become quite smooth, although it will stick a bit to your hands and the work top.
  • Smear a clean area of work surface with water. Place your dough on the watered area and cover with a clean bowl whose rim as been moistened with water. Leave it to relax (both you and your dough) for one hour.
  • Wet your hands and two plastic scrapers and stretch and fold your dough. Get ahold of the dough between your scrapers and pull it toward yourself, stretching it as far as you can without forcing it. Then fold it back on itself and pile it up on the main body of the dough. Repeat this from the back and left and right sides of the dough. You should be left with a tighter more vertical dough. Andrew says the point of this is "to thin the gluten membrane by stretching it, allowing a greater subsequent expansion of the dough, at the same time squeezing as little gas out of it as possible."
  • Put some wholemeal flour in a bowl. Pick up your dough and dip it in the flour, making sure it gets completely covered. Place in a proving basket with what will become the bottom facing up. Cover basket with a plastic bag and put in a warm place to prove for 3-5 hours.
  • Test the dough with your finger after it has expanded a fair amount. It is ready to be baked when an indentation made by your finger disappears slowly, "indicating that the pressure of gas in the dough may be passing its peak."
  • Turn your dough out CAREFULLY onto a baking sheet lined with parchment paper. If you're too rough with it you may hear a puff and a sigh as gas escapes from your loaf. Make a few cuts in the top and put in a oven preheated to about 450°F. After 10 minutes reduce heat to 400°F and bake for another half hour or until done.
I am still learning and each week my bread turns out differently (though always edible). It is fascinating to watch the evolution. I limit myself to doing only one thing differently from week to week so I can track the changes and try to make sense of them.

Wednesday, March 11, 2009

Wheat Leaven

A wheat leaven, the levain part of a pain au levain, requires very little to get going: a warm place (about 28 degrees Celsius), flour (preferably wholemeal, stoneground, organic), water (preferably filtered or spring), and time. You will require patience and possibly a thermometer.

Wheat Leaven

Adapted from Andrew Whitley's Bread Matters

  • 120g stoneground wholemeal wheat flour
  • 120g strong white flour
  • 200g water, filtered or spring
  • Day one: Mix 40g stoneground wholemeal wheat flour with 40g water. I use a quart canning jar covered with just the dome lid, but not the screw part. This way, if things really get going in there it will just pop off the top and not release the built up energy by breaking the glass. Put in a warm, draft-free place. Andrew says that for a wheat leaven 28°C is ideal. I ended up buying an indoor/outdoor thermometer for a couple bucks at the hardware store and have found it extremely helpful. Turns out I'm not very good at estimating what 28°C feels like. Although now that I do know what it feels like, I'm getting better.
  • Day two: Take your nascent starter from its cozy home and add to it another 40g wholemeal flour and 40g water. You probably won't notice a significant change in it yet.
  • Day three: Your starter might show signs of life--bubbling or frothing. Add to it another 40g wholemeal flour and 20g water. Andrew says, "The water proportion is slightly reduced to tighten the dough up a bit."
  • Day four: Add 120g strong white flour (or wholemeal flour, if you prefer) and 100g water to your starter. Andrew suggests white flour to lighten up the leaven, but it's really up to you. "After fermenting the Day 4 leaven for another 24 hours, you should have a leaven that smells slightly acidic and has risen appreciably (and probably collapsed)."
  • If nothing seems to have happened after day four: Mix 220g starter with 120g strong white or wholemeal flour and 100g water. Repeat another day if necessary.
  • OR
  • If it was showing signs of life and then seems to have died: Mix 130g starter with 60g wholemeal flour, 120g strong white flour and 30g water.
  • If your starter still isn't starting, try again from the beginning.
When I was starting my wheat leaven, it took repeating day four twice for it to really get going. I kept trying to convince myself that it had risen and fallen, when really nothing had happened yet. And then one morning I got up and checked it and my quart jar was completely full of leaven. It was gorgeous. It set the tone for the rest of the day--nothing could get me down; my leaven was alive! It's like the feeling you get when someone is trying to show you a constellation and you keep saying, "Yeah, I see it," and then you actually do see it and it's incredible.

Thursday, March 5, 2009

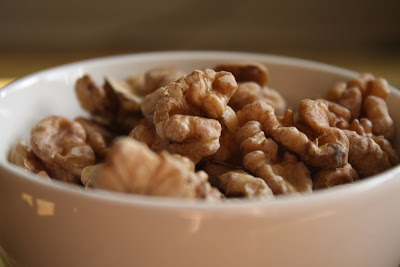
Crispy Walnuts and Pecans

I had known for some time that nuts are notoriously hard to digest. My love forthem, however, made me blind to this shortcoming. So it was with a great rising of my heart that I learned something could be done to make them more digestible. I had no idea that this same process would also make them ten times tastier.
I learned in Sally Fallon's Nourishing Traditions that nuts contain certain enzyme inhibitors that interfere somehow with digestion. By soaking nuts in salt water and subsequently drying them out these inhibitors are destroyed, making the nuts easier to digest. That's all well and good and my stomach is happier for it. The real treat, however, is the flavor and texture the nuts take on as a result of the process. They become very crispy, almost dissolving on your tongue, and at the same time buttery. Their saline bath gives them a saltiness that is not at all unwelcome and may even serve to enhance their nuttiness. If this soaking and drying process did nothing at all for the digestibility of the nuts, I would still do it just for the flavor.

Crispy Pecans and Walnuts

for 4 cups

  • 4 cups organic, raw walnuts or pecans
  • filtered water to cover
  • 2 tsp. sea salt
  • Put nuts in a large bowl and cover with filtered water.Stir in sea salt. Place bowl in a warm place for at least 7 hours or overnight. Drain and place nuts on cookie sheets or the shelves of a dehydrator and allow to dry out at 150°F for about 12 hours. When the nuts are crispy and dry all the way through they are done. Store in airtight containers. Pecans do not need to be refrigerated, but walnuts, which tend toward rancidity, should be.